
LEGACY Image Assets (Deprecated)
Image Assets
You can upload image assets to MAM and work with them alongside your colleagues by posting comments against a whole image asset, as well as against a specific part of an image asset. You can also place your image assets into collections so that they are organized and easy to locate. Uploading images assets to MAM, works in exactly the same way as it does for media assets.
MAM supports a variety of image formats including:
- JPEG
- JPEG 2000
- EXIF
- TIFF
- BMP
- PNG
- SVG
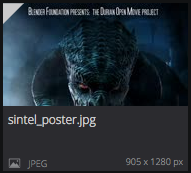
Each image asset is represented by a tile. On each image asset tile, you will see a preview of the image asset, the title, and the format.
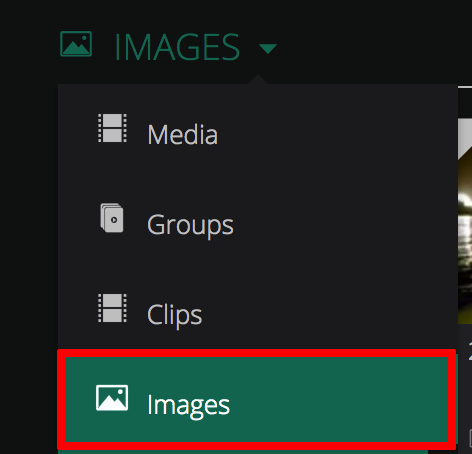
To access your image assets in MAM, click the filter drop down, and select Images from the list.
You can scroll back and forth through your existing image assets by clicking the back and forward arrows, located to the right of the Images carousel.

If you wish to view all of the image assets that you have uploaded to MAM, click the See All link in the top-right corner of the Images carousel. You are then taken to the Browse: All Images page, where you can see a complete list, ranging from newest to oldest.
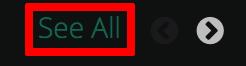
Image Asset Summary Panel
If you click on an image asset tile, a summary panel will appear on the right-hand side of the screen.
In the Asset Summary panel you will see:
A Preview of the Image Asset: This is a scaled down version of the larger image asset.

The Details tab: Displays specific details of that selected image asset such as the title, description, creation date, the asset type, when it was last modified, the owner, and whether or not the asset has been published. You can also view tags that have been applied to this asset, as well as add new ones.

The Comments tab: Here you can post an overall comment against the image asset, or you can post a comment against a specific area in the image asset.

Manage Image option: This option is located at the bottom of the panel. By clicking this option you can view more details about the image sset, as well as edit the metadata for the image asset.

Details Tab
You can view and change the summary details for an image asset directly in the Details tab.
To edit summary details:
- Click on the field value you wish to change, for example Description.

- Enter the new details.

- Click the Tick
 icon.
icon. - The changes are made.

You will also see a Published field which gives you the option to publish your image asset with one click. For more details about the one click publish action, please refer to the actions section of this guide. You will also see the state of the asset. For example: if it has been published or not.

Comments Tab
You can either post a comment against the entire image asset, or post against a specific area in the image asset.
To comment on an image asset
- In the Insert a comment box, enter your comment, and click the + icon.

- Your comment is then posted below.

To comment against a specific area in an image asset
- In the Manage Image view, click the + icon, located on the toolbar beneath the asset.

- Hold the left mouse button down, and drag the cursor across the image until the square has covered the desired area.

- To clear a selection, click the Clear option.
 - Enter a comment in the comment box, and click the + icon.

- The comment is then posted against the selected area. If you click on a specific comment in the list, the area that the comment was made against will be highlighted.

Manage Image Option
To access the Manage Image view, click the Manage Image option at the bottom of the Image Asset Summary panel, or double click the image asset tile in the browse / search windows.

The first thing you will see in the Manage Image Asset view, is the image itself. In the Manage Image page, you can view the image asset in a higher quality resolution. If you collapse the panel on the right-hand side, the image will resize, so that it fills the entire page.

At the bottom of the image, you will see a toolbar. This toolbar houses the following options:
- Zoom In / Zoom Out: This allows you to zoom in and out of the image. Drag the slider left and right to zoom in and out.

- Highlight: This option
 enables you to highlight one or more areas in an image asset, and then make comments against those selected areas. For example, there may be an area in an image asset that has a defect, and you might want to point that out to one of your colleagues by leaving a comment.
 - Pan: This option
 enables you to carefully move around a specific area of an image asset. This is done by clicking and dragging. This tool helps you to carefully examine an area you have zoomed in on.
 - Clear: This option
 enables you to clear the image of any selections you have made.
In the Manage Image Asset view, you will also see four tabs on the right-hand side of the page.
The Asset Overview tab
In the Asset Overview tab you can:
- View the basic details for that particular image asset
- View the relationships for that asset
- Change the details for that asset, such as the name or description
- Apply tags to help in searches
Metadata tab
Here you can view the metadata associated with the asset, as well as change the information in the metadata fields.
To change the information in these fields, click Edit![]() , make your change, and then click the Save
, make your change, and then click the Save![]() icon to finalise the change.
icon to finalise the change.
Technical Metadata tab
Here you can view the technical metadata for the asset. Technical metadata includes file, format, details. These details cannot be altered.
Comments tab
Under the Comments tab you can post new comments against the whole image asset, as well as post comments against a specific area in the image, by clicking and dragging.
Comments
0 comments
Please sign in to leave a comment.